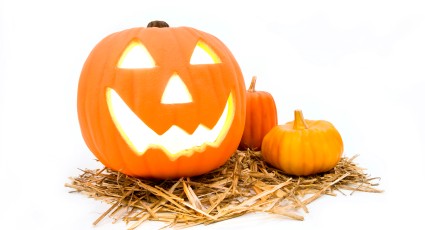
Step-by-step guide to Pumpkin carving
Monday, October 19th, 2015

Pumpkin carving can be a fun activity for you and your child to enjoy. Here we tell you how to do it safely, with your child’s help.
At this time of year, pumpkins are easily sourced in most supermarkets and farmers’ markets. Choose a small to medium-sized sturdy pumpkin by knocking on the skin (as you would a melon). If it sounds hollow, then it is ripe and ready for the carving!
Let your child design the pumpkin face by drawing on the skin in biro or felt tip pen. Don’t be overly ambitious; especially if this is the first time you have attempted this together. For younger children, two circular eyes, a triangle for a nose and a semi circle for a mouth should be sufficient, although you might want to experiment with teeth, eyebrows, star shapes and other designs for older, more experienced carvers.
The next step is to carve a lid’. Draw a circle around the pumpkin about 5cm below the stalk, and then cut carefully round it and through the flesh, using a large serrated bread sharp. A really clever idea at this point is to carve a very small corresponding notch on both the base and the lid, which will help you to remember where the two best fit together.
After this you must scoop out the innards, which is a messy, squidgy, fragrant business that your little one is bound to enjoy. Use spoons, fingers and whatever tools you deem necessary to remove all the seeds and flesh, and scrape the skin clean until the pumpkin is thin enough to effectively shine a torch through. If you’re careful, seeds can be saved for toasting and/or planting out next year to grow more pumpkins, and the flesh can be saved for pumpkin pie (if it’s removed hygienically of course!).
The next step is to start carefully carving out your design. For younger children it’s safest if you do this with a small, sharp knife while they watch; older children might be able to use some of the specialist pumpkin carving tool kits that are readily available online and in larger supermarkets around this time of year. If you’re using a knife, use a gentle sawing motion and take your time, as any slip-ups might necessitate a swift change of design.
Now it’s time to choose the source of light for your Pumpkin. Traditionally candles are used, and tea lights are well suited to this purpose, providing you have scraped out a relatively flat base for them to sit on. A candle will need enough oxygen to stay alight, so if you intend to put the lid back on top of the pumpkin, make sure enough large holes have been incorporated into the design to provide sufficient ventilation.
If safety is a concern, many people nowadays choose to use small torches and battery operated flashing LED lights; the latter creates a particularly striking effect.
Finally place your pumpkin on a heat proof plate and display it somewhere safe, where it can’t be easily knocked over, and well away from any flammable items.
Happy Halloween!
